After you sign up for Max Access, you may wonder if you can rebrand the toolbar to have your logo or link to your own website/a specific webpage. The good news: yes, you can!
However, it all depends on which version of Max Access you sign up for. Each version of Max Access has its own branding restrictions/options. Keep reading to find out the branding options for each type of Max Access account and how to apply brand changes.
Desktop Branding Options
Below are the available branding options per version of Max Access on desktop:
Free Version – You do not have the option to change the toolbar’s branding on the Free version of Max Access. The Max Access logo will be visible at the bottom right corner of the toolbar and it will link to the Max Access homepage.
Standard Version – You do not have the option to change the toolbar’s branding on the Standard version of Max Access. The Max access logo will be visible at the bottom right corner of the toolbar, but unlike the free version, it does not link to the Max Access homepage. This will lessen the number of users who would leave your website.
Pro Version – The Pro version of Max Access allows you to white label the toolbar and add your personal branding to it. You can add your own logo and also change the link that the logo will take users to.
Mobile Branding Options
Below are the available branding options per version of Max Access on mobile:
Free Version (mobile) – The Free version of Max Access does not allow you to change the toolbar’s branding. It will show the Max Access logo and link to the Max Access homepage.
Standard and Pro Versions (mobile) – Both the Standard and Pro versions exclude a logo/link entirely. You cannot add your own logo or link, but the Max Access logo/link to the Max Access homepage will not appear, either.
How to Change Your Logo and Logo Link
Changing your logo and your logo link are both done in the same place.
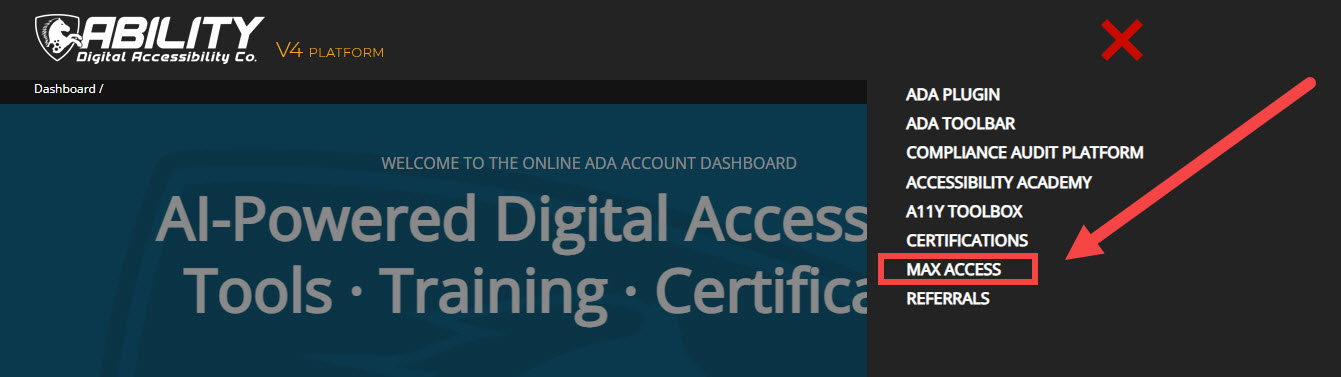
Once you login you’ll be taken to your account Dashboard. From here, select Max Access from the main menu in the top right part of the screen, located in the header.
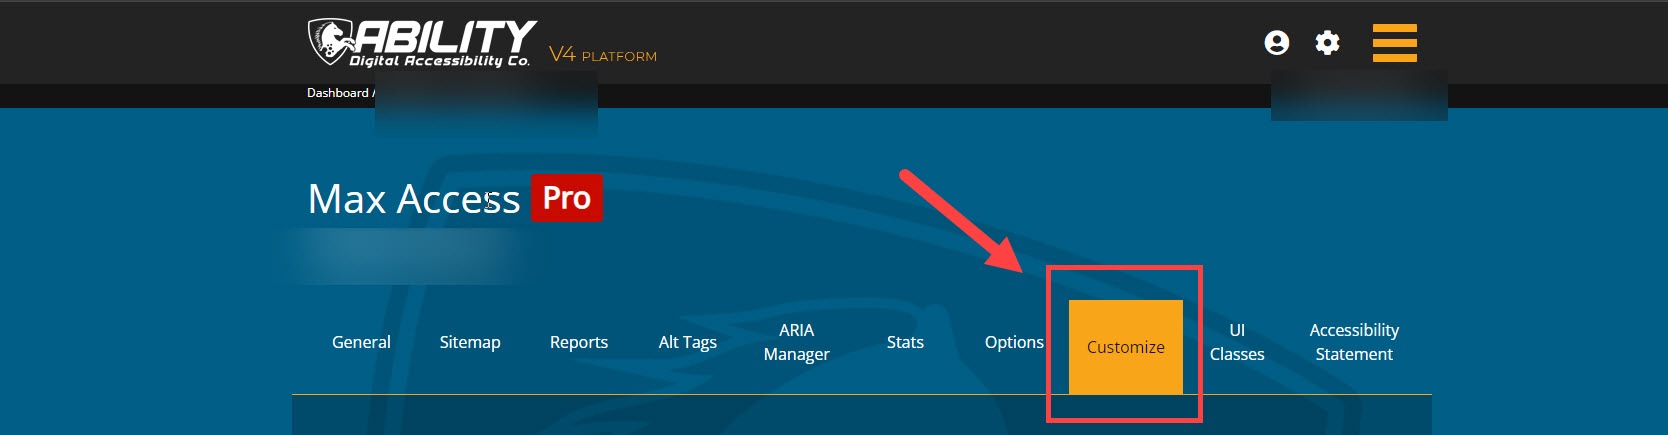
Once the Max Access dashboard page is open, select the Customize tab. Here you’ll see options to white label the toolbar and change the logo link URL (if you have a version that allows branding customization).
Upload your logo and change the logo link here as you see fit, and then select the Save button at the bottom of the page.
That’s it! Your Max Access toolbar is now customized to have a different brand. For more information on customizing your Max Access installation, check out this tutorial.