How to Add Multiple Max Access Licenses to an Existing Account
Creating a brand new, separate account for individual URLs can be a total a pain. But good news! If you own or maintain multiple websites and want to add Max Access to each one, you can add (and manage) multiple Max Access licenses all under one single account. To add multiple licenses to an existing account, follow the steps below.
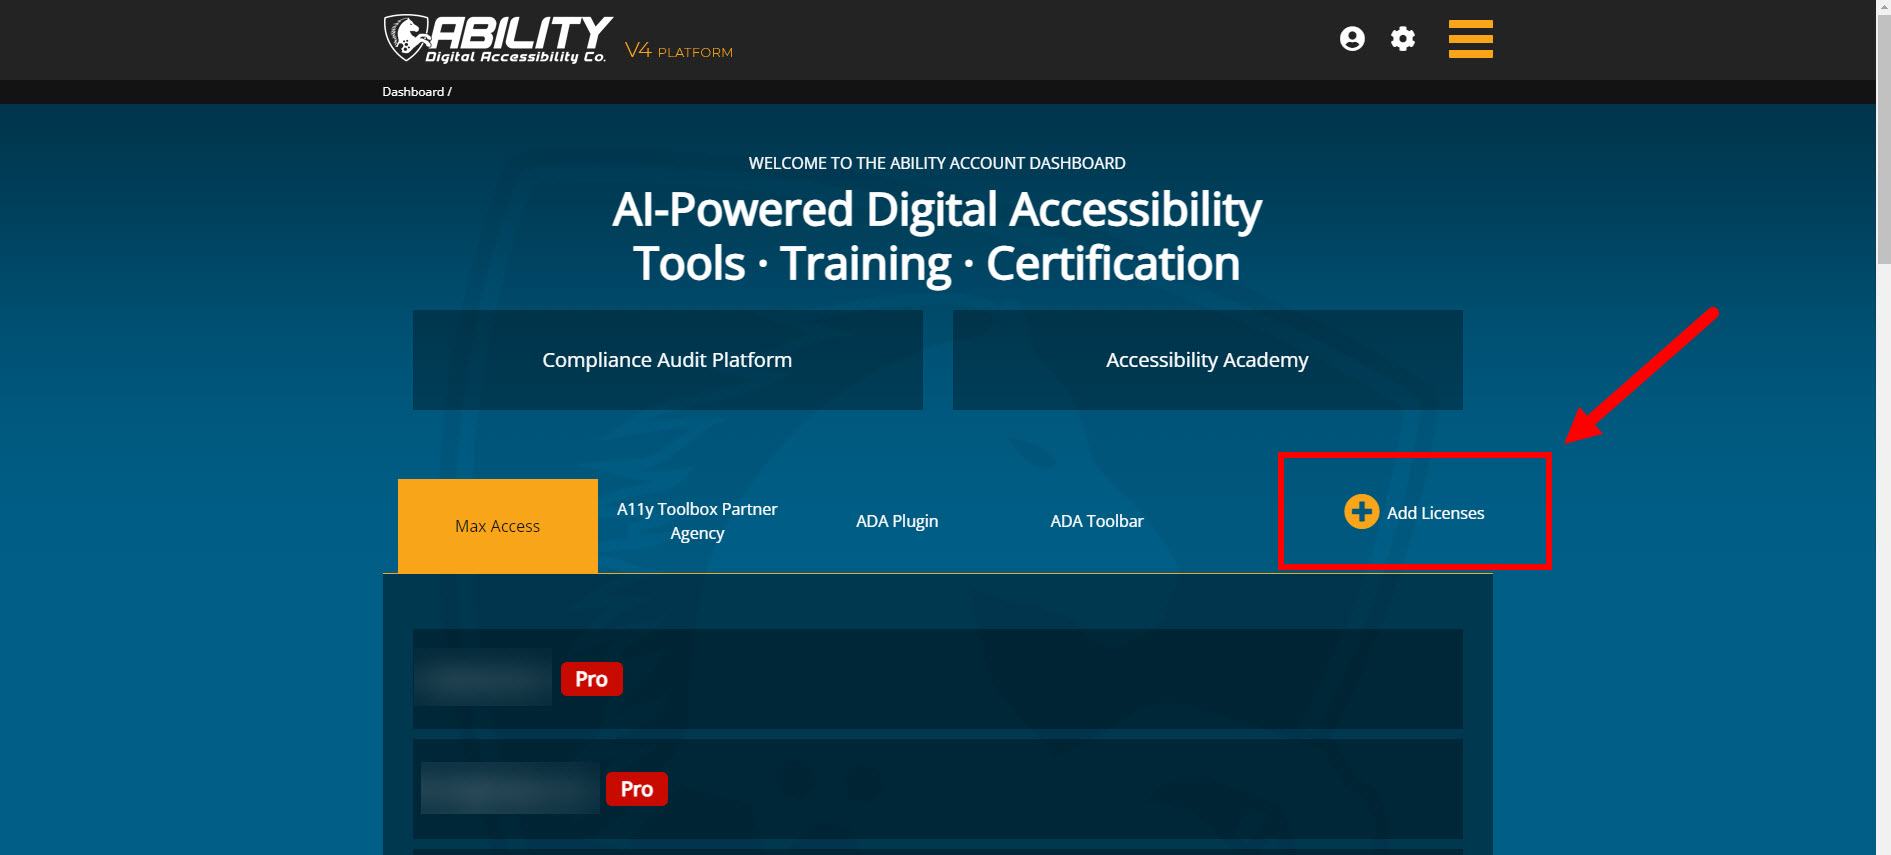
2. Select the “Add Licenses” button (next to the plus icon), located at the far right end of the tab options in the main section of the dashboard.
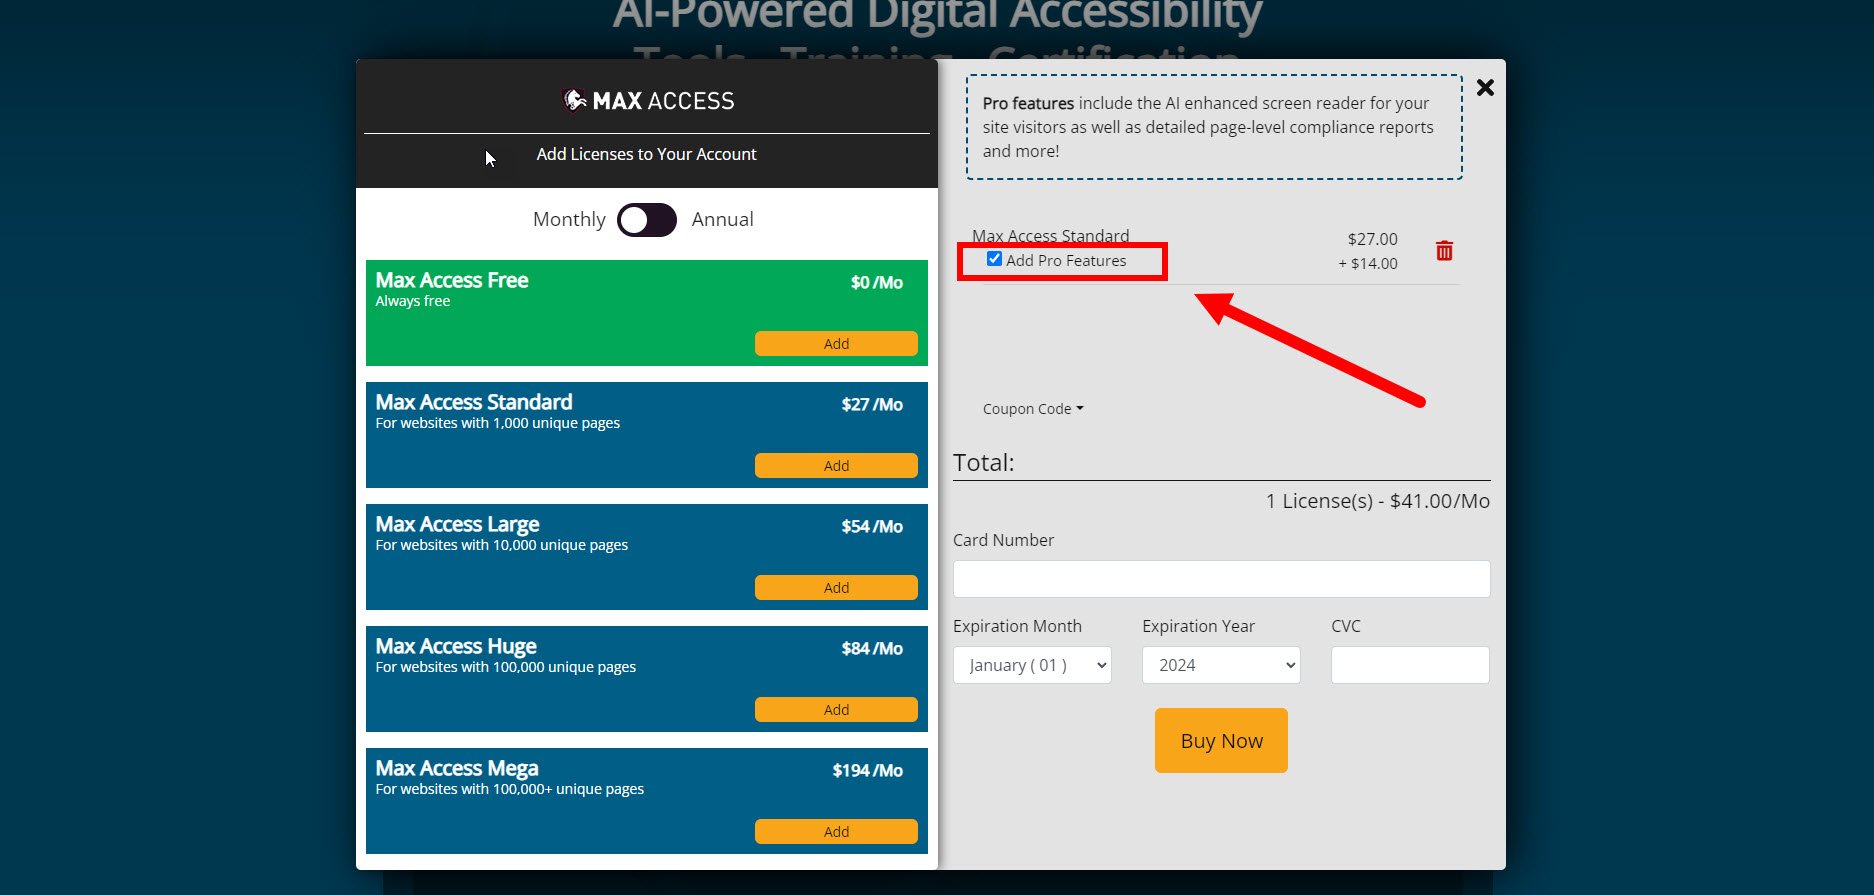
3. Select the “Add” button next to license type you want to add for your new URL. If you are adding a paid license, be sure to choose whether you want a Monthly or Annual payment plan too!
4. If you are adding a paid license and want to include Pro features, make sure to check the Pro checkbox next to your Max Access license in the Items list.
Pro can be added to any paid license of Max Access, and includes additional accessibility features such as extended remediation reports, usage statistics, white labeling options, and more. To learn more about Max Access Pro, visit our Features page.
5. If you are adding a paid license, input any coupon codes that you may have into the coupon code text box. If you are adding a free license, skip to Step 8.
6. Select the “Apply” button to apply the coupon code.
7. Enter your payment information.
8. If you are adding a paid license, select the “Buy Now” button. If you are adding a free license, select the “Get Free Licenses” button.